Autonomous Humanoid Robot
It all built up to this! Every project before was a step along the path to an autonomous humanoid. This blog tracks our journey to build a fully autonomous humanoid.
Sean and Connor Miller
Introduction
Like our completed R2D2 build, we expect this one to be another multi-year journey - particularly with Connor's school workload only affording us to tackle major feats during holiday breaks. The end game is to have a walking and talking C3PO inspired humanoid. The intent is not to be movie accurate - but rather, explore humanoid application for the Oil & Gas and hazardous chemicals industries.
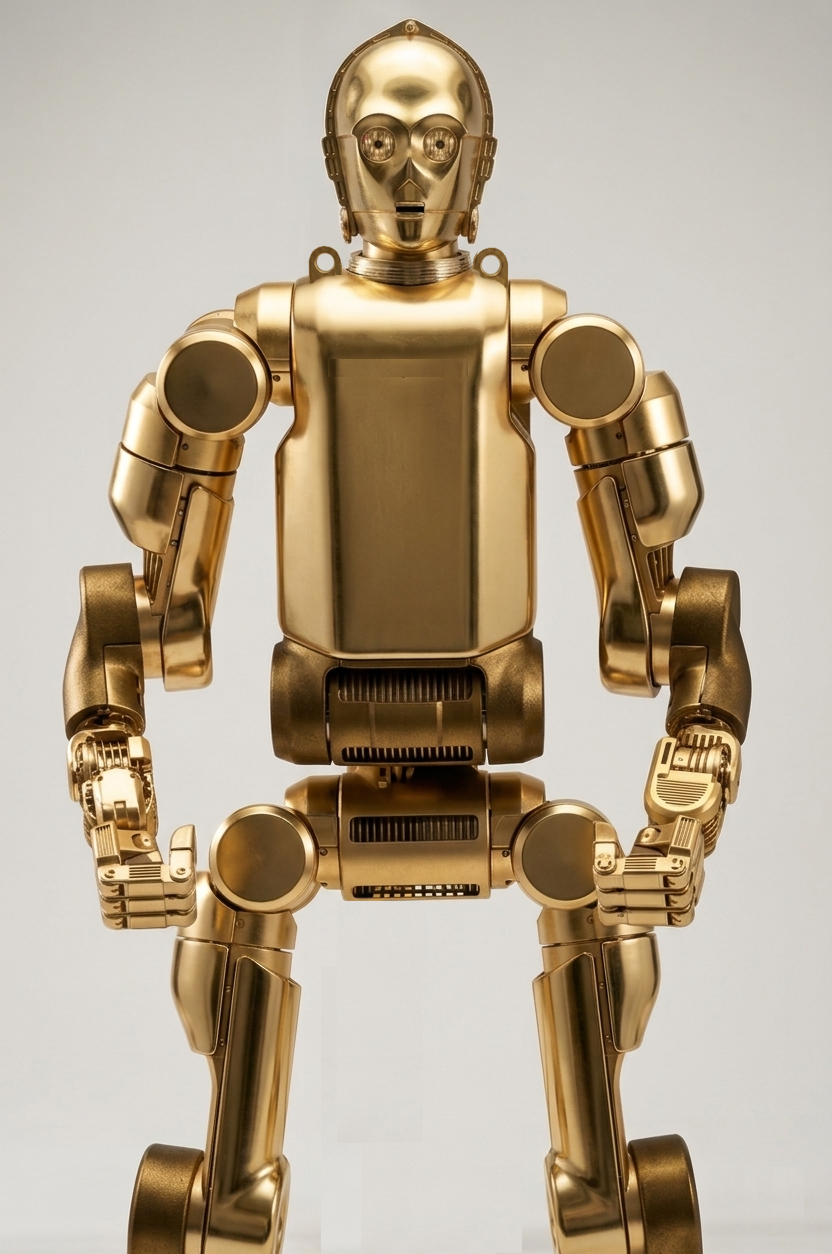
Concept Art: Boston Dynamics/Fallout Inspired Industrial C3PO Form Factor
Using Connor's passion for AI applications and his father's 30 years of manufacturing use-cases in mind - this droid is intended to prototype and test for realistic economical applications of a humanoid in industry.
PCBWay, the Chinese printed circuit board and general parts fabricator, has graciously offered to sponsor this build providing us with prototyped PCBs.
![]()
Note: this blog is presently under constant editing as we chip away at each step. Feel free to comment at the bottom if you have any questions.
Architecture
Being a biped, we are implementing Whole-Body Control using a linearized LQR framework on the edge microcontrollers. The architecture is in part in the "cloud" with microcontrollers based on the ESP32-S3 series on the edge components. The edge components use a Can Bus throughout the body and appendages for strong signal reliability. In addition, it allows to use WiFi to handle speech and machine vision compute on a companion server. The communication protocol to the server is OSC (Open Sound Control) over UDP (User Datagram Protocol). This provides a human readable communication protocol to allow for logging that we can readily assess.
Custom built cycloid drives actuated from IMU data feeding the LQR framework will be the basis for appendage motion. The neck joint is a simple servo. Our hypothesis is that controlling physical angles and applying PID control to angular rates of appendages to target angles will be more natural than calculating traditional servo motor rotational setpoints. It will also allow for easy motion capture from a companion Unity Virtual Reality rig to translate to canned animations. This comes from our learnings on our Rawpter 9 Drone project. We found that rather than controlling propeller motor speeds directly, we rather cascade an IMU angle desired set point to a gyro desired speed that cascades to a motor speed mix. This made for amazingly better piloting performance.
We use the term "cloud" loosely in that it will not rely on cloud services, but rather local PC hardware on the local intranet network. Using EPS32-S3 wireless capability, we will hit an API to process the text-to-speech and return back WAV files for local output and/or instructions for appendage commands. This offloads all compute to a higher power, central machine to more easily scale capabilities. However, safety interlock compute will remain fully on the appendage edge devices.
Safety
The following critical safety features will be integrated:
- Appendage design will be ruggedized to take impacts - applying padding to contact points (knees, elbows, back, etc) from falls.
- Pinch points will be entirely eliminated or contoured to displace objects and minimize potential for injury during handling. Surface mounted strain gauges will be applied to detect foreign objects
- Fail-safe features such as "safe sitting" will be designed to address loss of communication with the mainframe.
- Machine Vision will detect humans nearby and place the robot in still mode.
Build Order
- Speech-to-Text (complete)
- Text-to-LLM-to-RVC (complete)
- RVC-to-User (complete)
- Head (in progress)
- Body Subframe
- Motors
- Motherboard
- Machine Vision
- Unity Digital Twin Simulation
- Unity VR Motion Capture
- Body Animations
- Autonomous Walking
- Autonomous Grabbing
1. Speech-to-Text
Rather than solely relying on a remote graphical interface, voice commands will be integrated into the design. Since this requires speech-to-text capability, we looked beyond basic commands to provide the power of a full LLM. This will allow him to understand and respond in any language. In addition, he will have the broad knowledge from the LLM training on general questions in addition to "lookup" text. Ollama is the present LLM deployed, but we are coding to be modular so that as open-source LLM tech evolves, we can readily plug and play new models.
The following code demonstrates our Speech-to-Text. It monitors in an efficient loop for sound. Once triggered greater than a set decibal threshold, it listens for the trigger-word C3PO. It then captures the full audio and runs it through the Speech-to-Text library. If all is well, it passes it on for processing.
# listener.py
import sounddevice as sd
import librosa
import soundfile as sf
import queue
import numpy as np
import subprocess
import sys
import os
from faster_whisper import WhisperModel

print("Please wait...")

TRIGGER_WORD = "3po"
SAMPLE_RATE = 44100
BLOCK_DURATION = 3
MODEL_SIZE = "base"
VOLUME_THRESHOLD = 0.02  # Adjust as needed

# Load Whisper model
try:
    model = WhisperModel(MODEL_SIZE, device="cpu")
except Exception as e:
    print("Failed to load Whisper model:", e)
    exit(1)

input_devices = [i for i, d in enumerate(sd.query_devices()) if d['max_input_channels'] > 0]
sd.default.device = (input_devices[0], None)  # Use first valid input device

# Audio stream setup
audio_queue = queue.Queue()

def audio_callback(indata, frames, time, status):
    if status:
        print("Audio status:", status)
    audio_queue.put(indata.copy())

def listen_for_trigger():
    print("🔊 Waiting for sound to exceed threshold...")
    try:
        with sd.InputStream(samplerate=SAMPLE_RATE, channels=1, blocksize=4800, callback=audio_callback):
            while True:
                # Wait for a loud enough chunk
                chunk = audio_queue.get()
                peak = np.max(np.abs(chunk))
                if peak < VOLUME_THRESHOLD:
                    continue  # Too quiet, skip

                print(f"🔊 Sound detected! Peak volume: {peak:.4f}")
                audio_block = [chunk]

                # Collect full block after trigger
                CHUNKS_PER_BLOCK = int(SAMPLE_RATE * BLOCK_DURATION / 4800) - 1
                for _ in range(CHUNKS_PER_BLOCK):
                    audio_block.append(audio_queue.get())

                audio_data = np.concatenate(audio_block, axis=0).flatten()
                print(f"Collected the audio data!")
                # Normalize
                peak = np.max(np.abs(audio_data))
                audio_data = audio_data / peak
                print("Normalized audio data.")
                # Resample to 16kHz
                audio_data = librosa.resample(audio_data, orig_sr=SAMPLE_RATE, target_sr=16000)

                print("Transcribing...")
                segments, _ = model.transcribe(audio_data, language="en", beam_size=5)
                segments = list(segments)
                print("Segments returned:", segments)

                for segment in segments:
                    text = segment.text.strip()
                    print("Heard:", text)
                    if TRIGGER_WORD in text.lower():
                        print("Trigger word detected!")

                        # Write transcript to input/input.txt
                        os.makedirs("input", exist_ok=True)
                        with open("input/input.txt", "w", encoding="utf-8") as f:
                            f.write(text)

                        subprocess.run([sys.executable, "get_response.py"])
                        #time.sleep(2)
                        return
                    else:
                        print("Trigger word not detected.")
    except Exception as e:
        print("Error: Mic stream failed:", e)
        exit(1)

if __name__ == "__main__":
    listen_for_trigger()
2. Text-to-LLM-to-RVC
Once the human's speech is captured, the speech-to-text routine's resulting text string is passed to an LLM. The LLM is seeded with the personality of C3PO, an anxious scaredy-cat that overly desires to be helpful with his intellect. It processes the input and responds accordingly.
Once we have a head and body, we will add python functions trigger back API calls to the main controller to perform tasks based on the input. For example, the LLM can process the input with such seeding like this "You are C3PO from Star Wars. You speak with anxiety if a challenge is presented. If this input statement sounds like they are telling you hello, respond with this exact text: Humanoid Run Hello". Otherwise, respond to your best ability."
Once the text is onverted to a WAV file response in the prior routine, we must pass it through RVC to get the voice we want. For the fun factor during development, we are using Anthony Daniels modeled voice. We could just use a canned voice and skip this step, but that wouldn't be any fun. Like Elon Musk said, who wouldn't want their own C3PO?
The text is first spoken by Microsoft Davids text-to-speech to generate a base Wave File to the pitch and pacing we targeted. We then run it through RVC to change to his timbre and accent.
Below is server side code that does all that when called:
import os
import re
import time
import pyttsx3
import ollama
import sounddevice as sd
import soundfile as sf
from pydub import AudioSegment
from infer.modules.vc.modules import VC
from infer.lib.audio import save_audio


# === CONFIG ===
class Config:
    def __init__(self):
        self.device = "cuda"  # GPU Power
        self.is_half = False  # Use float32 on CPU
        self.x_pad = 1
        self.x_query = 10
        self.x_center = 60
        self.x_max = 65
        self.n_cpu = 4

config = Config()

# === PATHS ===
model_name = "LegoC3PO_710e_10650s.pth"
index_path = "assets/weights/LegoC3PO.index"
input_audio = "input/test.wav"
output_audio = "output/converted.wav"
response_audio = input_audio  # TTS output path

# === SETUP ===
os.environ["weight_root"] = "assets/weights"
os.environ["index_root"] = "assets/weights"
os.makedirs("input", exist_ok=True)
os.makedirs("output", exist_ok=True)

# Load the Voice Model
print("🔧 Loading RVC Model...")
vc = VC(config)
vc.get_vc(model_name)

# === LOAD USER INPUT ===
user_text = ""
try:
    with open("input/input.txt", "r", encoding="utf-8") as f:
        user_text = f.read().strip()
        print(f"📄 User said: {user_text}")
except Exception as e:
    print(f"Failed to load input text: {e}")

# === REFINE INPUT TEXT (Removing Trigger Word) ===
final_user_prompt = user_text
match = re.search(r"\b3po\b[:,]?\s*(.*)", user_text, re.IGNORECASE)
if match:
    final_user_prompt = match.group(1).strip()
    print(f"Refined prompt for Ollama: {final_user_prompt}")

# === OLLAMA (THE BRAIN) ===
# This is where the magic happens. We send the text to the local AI.
c3po_response = "I am terribly sorry, but my communication circuits appear to be malfunctioning."

if final_user_prompt:
    print("C-3PO is thinking...")
    try:
        response = ollama.chat(model='c3po', messages=[
            {'role': 'user', 'content': final_user_prompt},
        ])
        c3po_response = response['message']['content']
        print(f"🤖 C-3PO says: {c3po_response}")
    except Exception as e:
        print(f"Ollama Error: {e}")
        c3po_response = "Oh my! I seem to have lost connection to my primary logic core."

# === TTS SYNTHESIS (THE ROBOT VOICE) ===
# We generate the base robotic voice using the text from Ollama
engine = pyttsx3.init()
voices = engine.getProperty('voices')
for voice in voices:
    if "David" in voice.name:  # David is the standard US male voice on Windows
        engine.setProperty('voice', voice.id)
        break
engine.setProperty("rate", 125)  # Slow him down a bit
engine.save_to_file(c3po_response, response_audio)
engine.runAndWait()

# === PITCH SHIFT ===
# Raise the pitch to make the deep TTS sound like a droid
audio = AudioSegment.from_wav(response_audio)
octaves = 0.6
new_sample_rate = int(audio.frame_rate * (2.0 ** octaves))
high_pitch_audio = audio._spawn(audio.raw_data, overrides={'frame_rate': new_sample_rate})
high_pitch_audio = high_pitch_audio.set_frame_rate(22050)
high_pitch_audio.export(response_audio, format="wav")

# === RVC CONVERSION (THE LEGO SKIN) ===
print("Applying C-3PO Voice Model...")
info, result = vc.vc_single(
    sid=0,
    input_audio_path=response_audio,
    f0_up_key=0,
    f0_file=None,
    f0_method="crepe",
    file_index=index_path,
    file_index2=None,
    index_rate=1.0,
    filter_radius=3,
    resample_sr=22050,
    rms_mix_rate=0.25,
    protect=0.33,
)

# === SAVE & PLAY ===
if "Success" in info and result[1] is not None:
    tgt_sr, audio_opt = result
    save_audio(output_audio, audio_opt, tgt_sr)
    print(f"Conversion complete. Playing audio...")

    # Using SoundDevice instead of PyDub to avoid permission errors
    data, fs = sf.read(output_audio)
    sd.play(data, fs)
    sd.wait()
else:
    print(f"Conversion failed:\n{info}")
3. RVC-to-User
Once the WAV file for the response is generated, it is streamed back to the robot and plaid out the speaker in its head. The routine also for an "interrupt" flag to interrupt any current speech or to let him finish his current speech output. At this point, we effectively have an LAN version of Amazon Alexa that sounds like C3PO, but a lot smarter than the original Alexa - and one that can issue silent commands to our edge device (the humanoid).
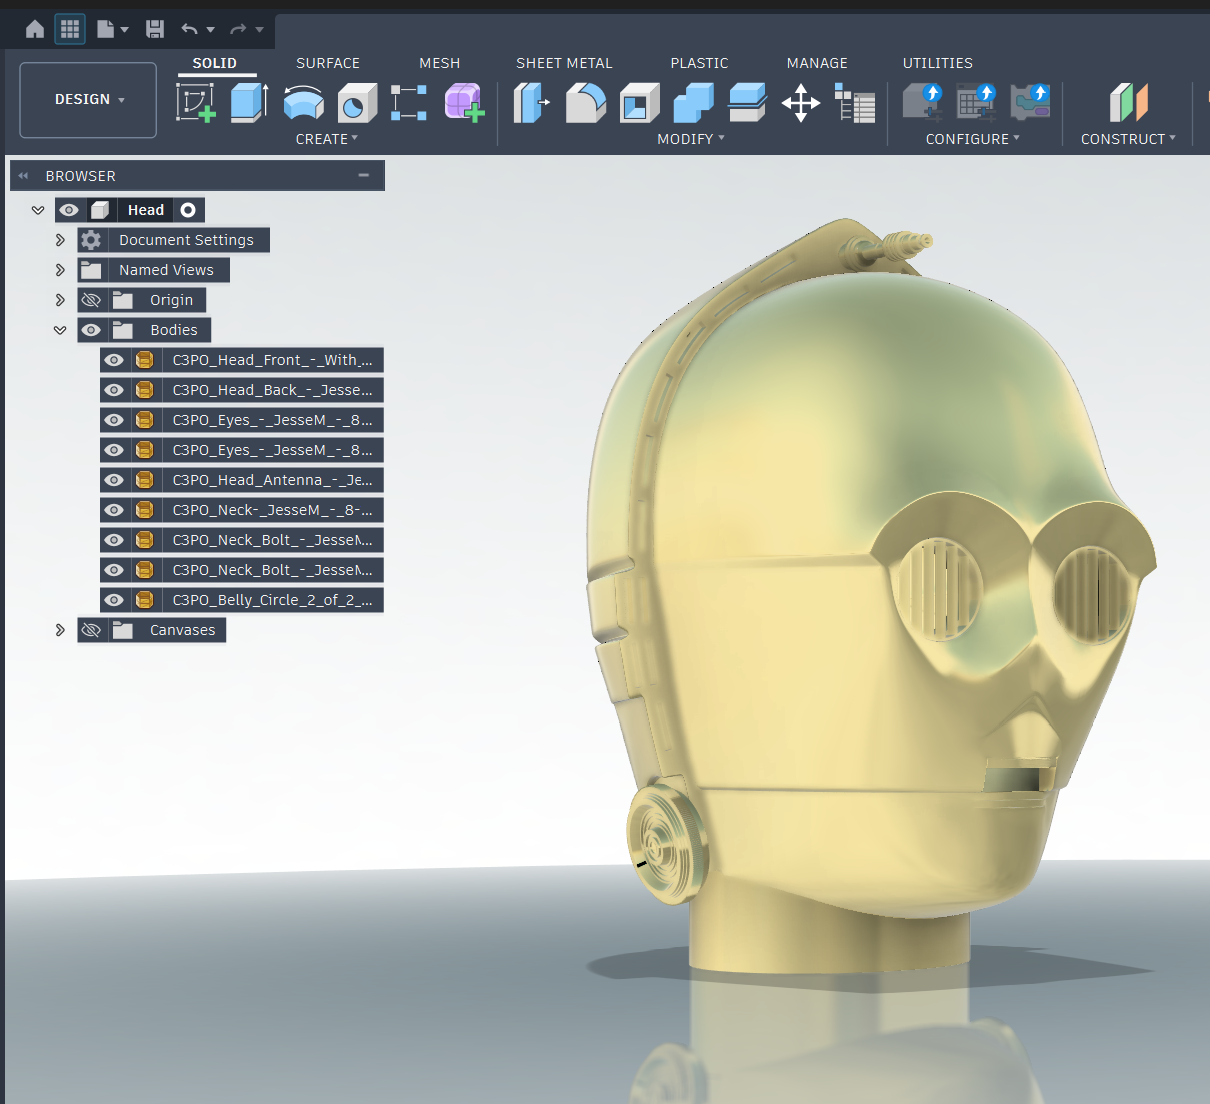
4. Head
The base STL files for the head were fortunately available on Thingiverse (Credit Jesse Maricelli). This will give us an interesting geometry to use for the fun factor, but the end head design will be custom and unique. It is fully detachable and rechargeable on its own. A single servo will handle pitch of the head while a 1/2" copper shaft stemming up the boddy will allow for cable management and yaw rotation. 360 degree turning will be allowed, but will "unwind" since we are not using a slip ring.
5. Body Subframe
The subframe will be a mix of a 3D printed trusses and 1/2" copper sweat fitted. The 3D printing is for attaching the skins to be cut from High Impact Polystyrene. The copper is what will provide EMI shielding and the rigidity of its core. STL files coming soon...
6. Motors
Coming soon...